Showing posts with label felt food. Show all posts

Tuesday, September 28, 2010

Finally, felt cupcake tutorial!


I've shared this tutorial on The Sugar and Spice Weekly Link Party at BCD 125


It's my birthday tomorrow, so I figured it would be the perfect day for my felt cupcake tutorial! I only have one to show you right now as the other 5 are in the middle of "baking"!

You will need:
*Template- click here
*Felt for bottom and side of cupcake. In this case, it's chocolate brown.
*Felt for frosting. This one is a cream cheese frosting.
*Matching embroidery thread for both.
*Poly fill
* optional-4 to 6 different brightly colored embroidery threads for sprinkles
* optional-red pompom and maroon embroidery thread for cherry


Now that you have all of you supplies, lets get started.
Cut out your pattern pieces from your felts.

Sew the triangle cutouts together to form your cupcake top.


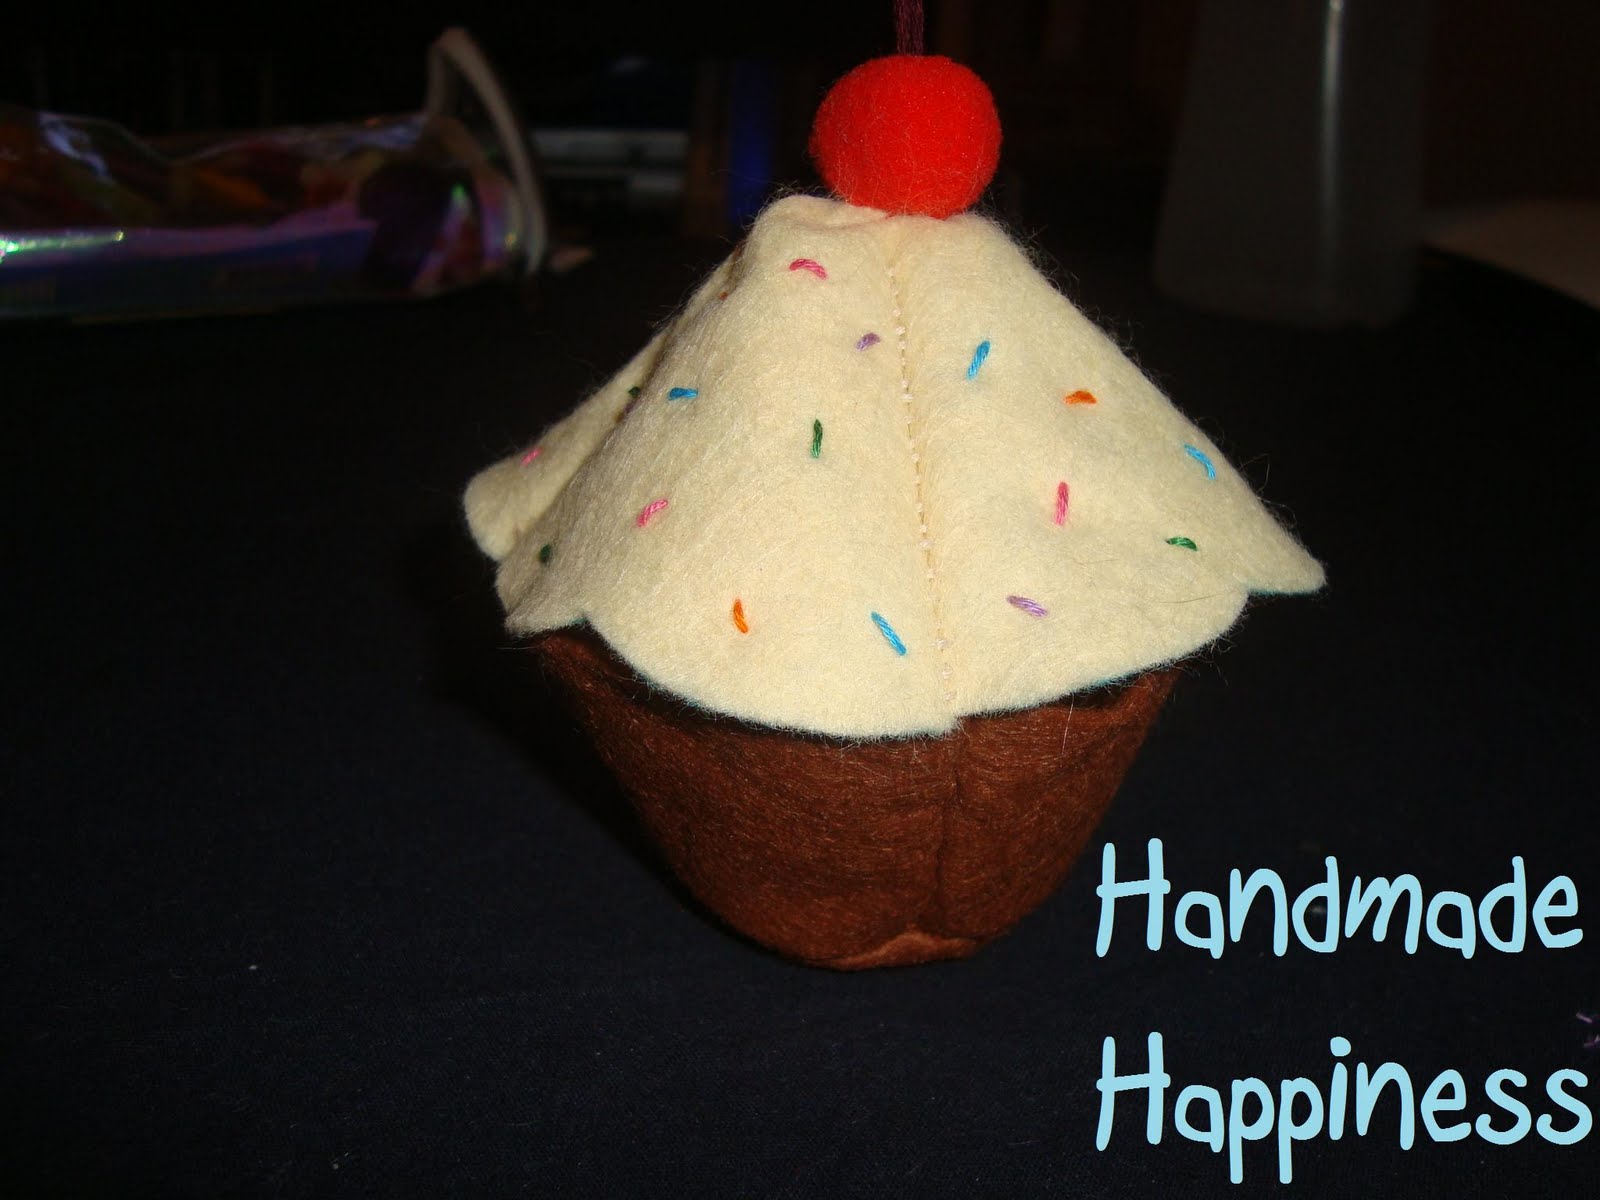
Embellish you top now. I added colorful sprinkles all over by just taking 2 stands of embroidery thread, and "sprinkling them all over in random order to look like real sprinkles.


I also added a cherry I made myself. To do this take a cherry sized pompom and threaded 4 stands of maroon embroidery thread through the center of it starting at whatever point will be the bottom.
Pull the threads tight at the top and go back down to the bottom and then back up to the top. If you pull it tight it will hid the threads and make a little pucker in the top like a real cherry.
Now place a knot about an inch up to make your stem. Cut the excess as close to the knot as your comfortable with.


Sew to the top of the topper. You now have your cupcake top.


Onto the bottom, take the curved side piece and sew together the edges to make a little open ended cone.


Keeping the cone with the stitched side out, sew the small round bottom onto the cone.


Flip right side out so stitching is all on the inside of you cupcake bottom now.


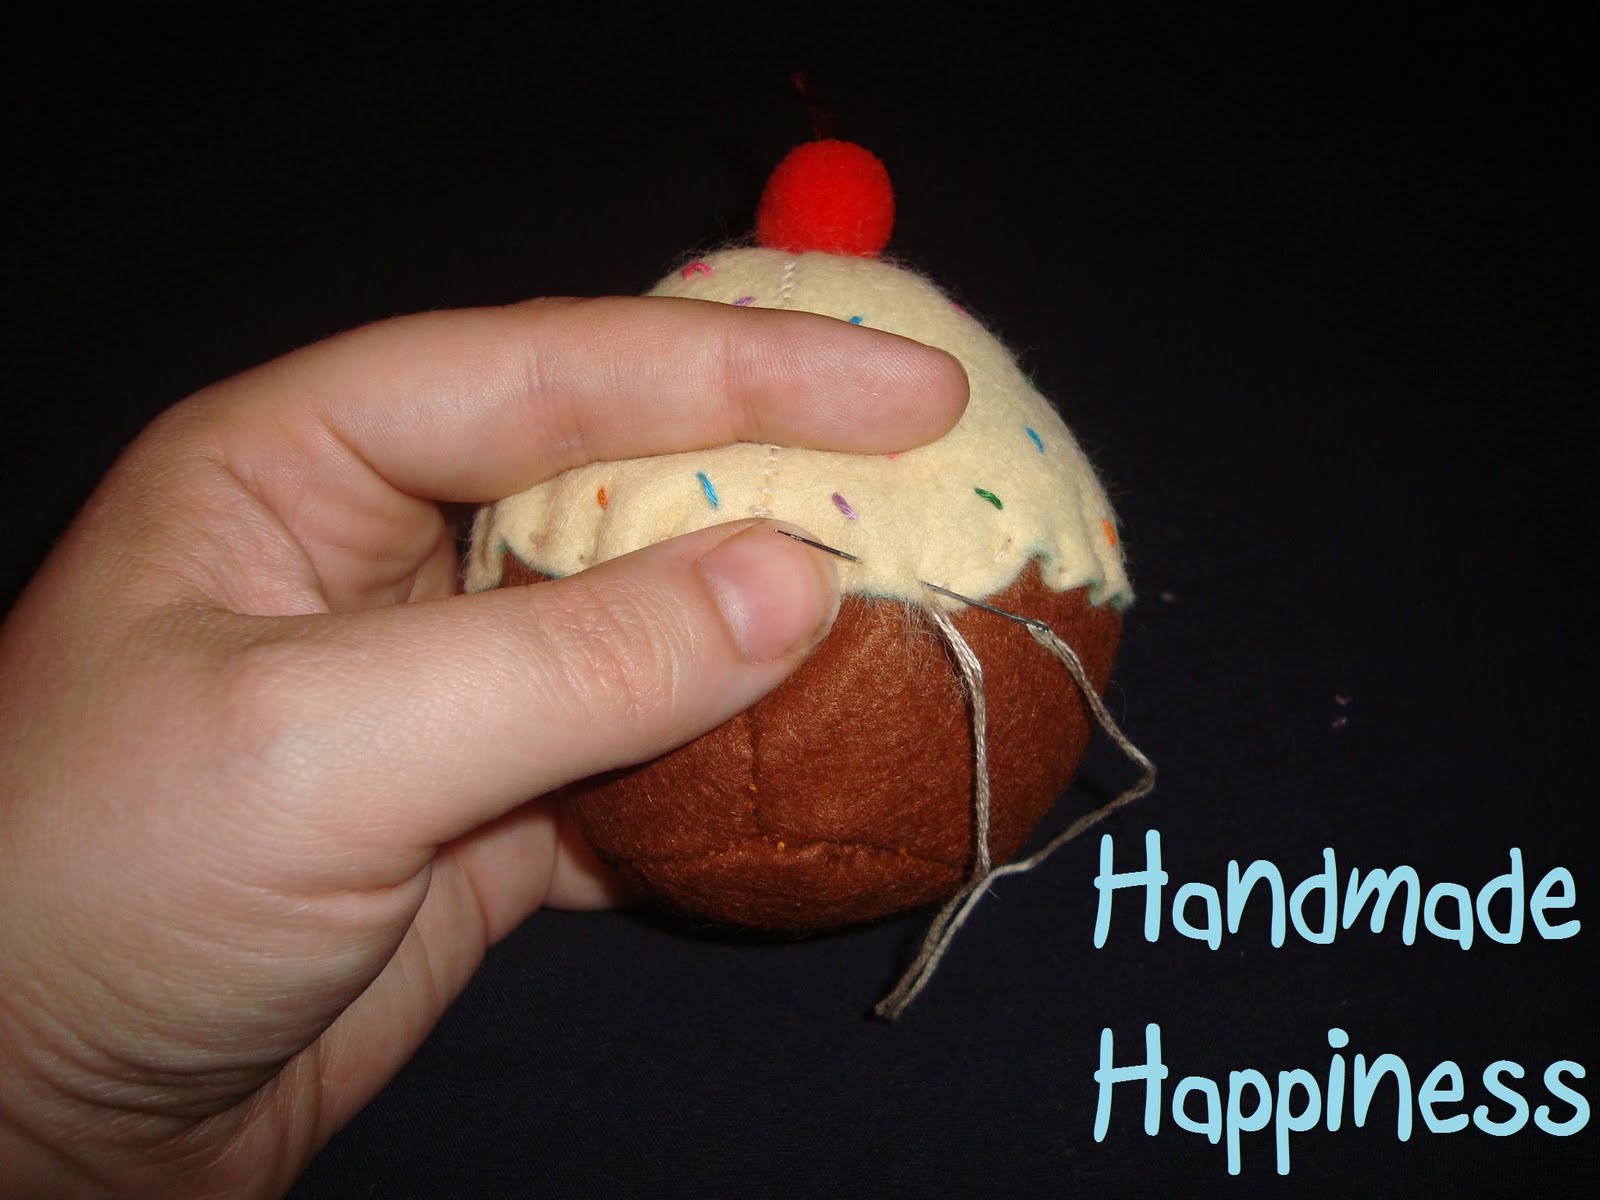
Carefully line up your top to your bottom (you could pin it to keep it in place but I don't have a picture of this).


Stitch along the edges, making sure to always hit both the bottom and top with each stitch. Leave about 1-1/2 inches open to stuff.


Now stuff to desired feel and sew up the rest of the edge.


I made these to fit into a regular muffin pan so I could make a half dozen and it would be perfect for play.


I'm off to celebrate with my family! Have a great day!


As with all of my projects, I have designed them for my family and love to share with you so you can have them for your families as well. All projects, patterns and directions are meant for your personal use and neither the patterns nor completed projects are to be used for monetary gain.

Monday, September 13, 2010

Felt food tutorial #1 - Felt pizza


Thin crust pepperoni pizza is Peanut's favorite so the felt thin crust pepperoni pizza was born! This was super easy once I made the pattern. I hand stitched all of my felt foods but you can machine them as well. I used a straight stitch on the sauce and cheese. A whip stitch for the outside of the crust (wish I had done a blanket stitch though) and just spot tacked the pepperoni. I really like the portability of this project. I packed all of my supplies into a container and can take them with me while I wait in line for my son to get out of school or take it as far as the couch to be with the family during TV time! Do you want one? Okay then let's do this!

You'll need:
Pizza pattern This is my first PDF so if it doesn't work for you email me and I'll send it to you!
Felt for cheese(buttermilk color), crust (beige), sauce (maroon), pepperoni (scarlet)
Coordinating embroirdery floss
Center stabilizer- most people use cardboard but I have this hard felt I bought at Joann's over a year ago and I like it better. (I have a 2 year old, things get wet unexpectedly. Like when they take them to the real sink!)
Also I added velcro to the back of the bottom crust because I have a pizza pan project slated for the near future.


First print and cut out all of your pattern pieces, four of all except the pepperoni, I made four per slice so 16 total.

At this point I added the velcro to the back of the bottom piece.


Now, I've tried many different combinations for building the pizza and this is what worked the best.

Sew the sauce onto the back of the cheese like this...


Now sew the edge crust onto the back of the sauce like this...


Now sew on the pepperonis like this...


Now sew bottom crust onto the front like this...


Slide the stabilzer piece in like this...


Finish sewing the rest of the way around. And you now have a playful pepperoni pizza! You can make just one, but I know you'll want three more so you can share your pizza... I mean so the kids can share their pizza!


If you like this one just wait until I put up my tutorial for the cutest cupcakes!! See you soon!


So far this has been shared at The Girl Creative Party Blog


As with all of my projects, I have designed them for my family and love to share with you so you can have them for your families as well. All projects, patterns and directions are meant for your personal use and neither the patterns nor completed projects are to be used for monetary gain.