
These bags are so simple and customizable you can make one for everyone! I just started this project meaning to make the bag with a plain felt applique, then it grew. It grew to a felt applique and embroidered Happy Halloween applique. Then as I was sewing on the first felt applique I thought, "I really could make this 3D." So, this simple bag took on it's own little life.
You'll need:
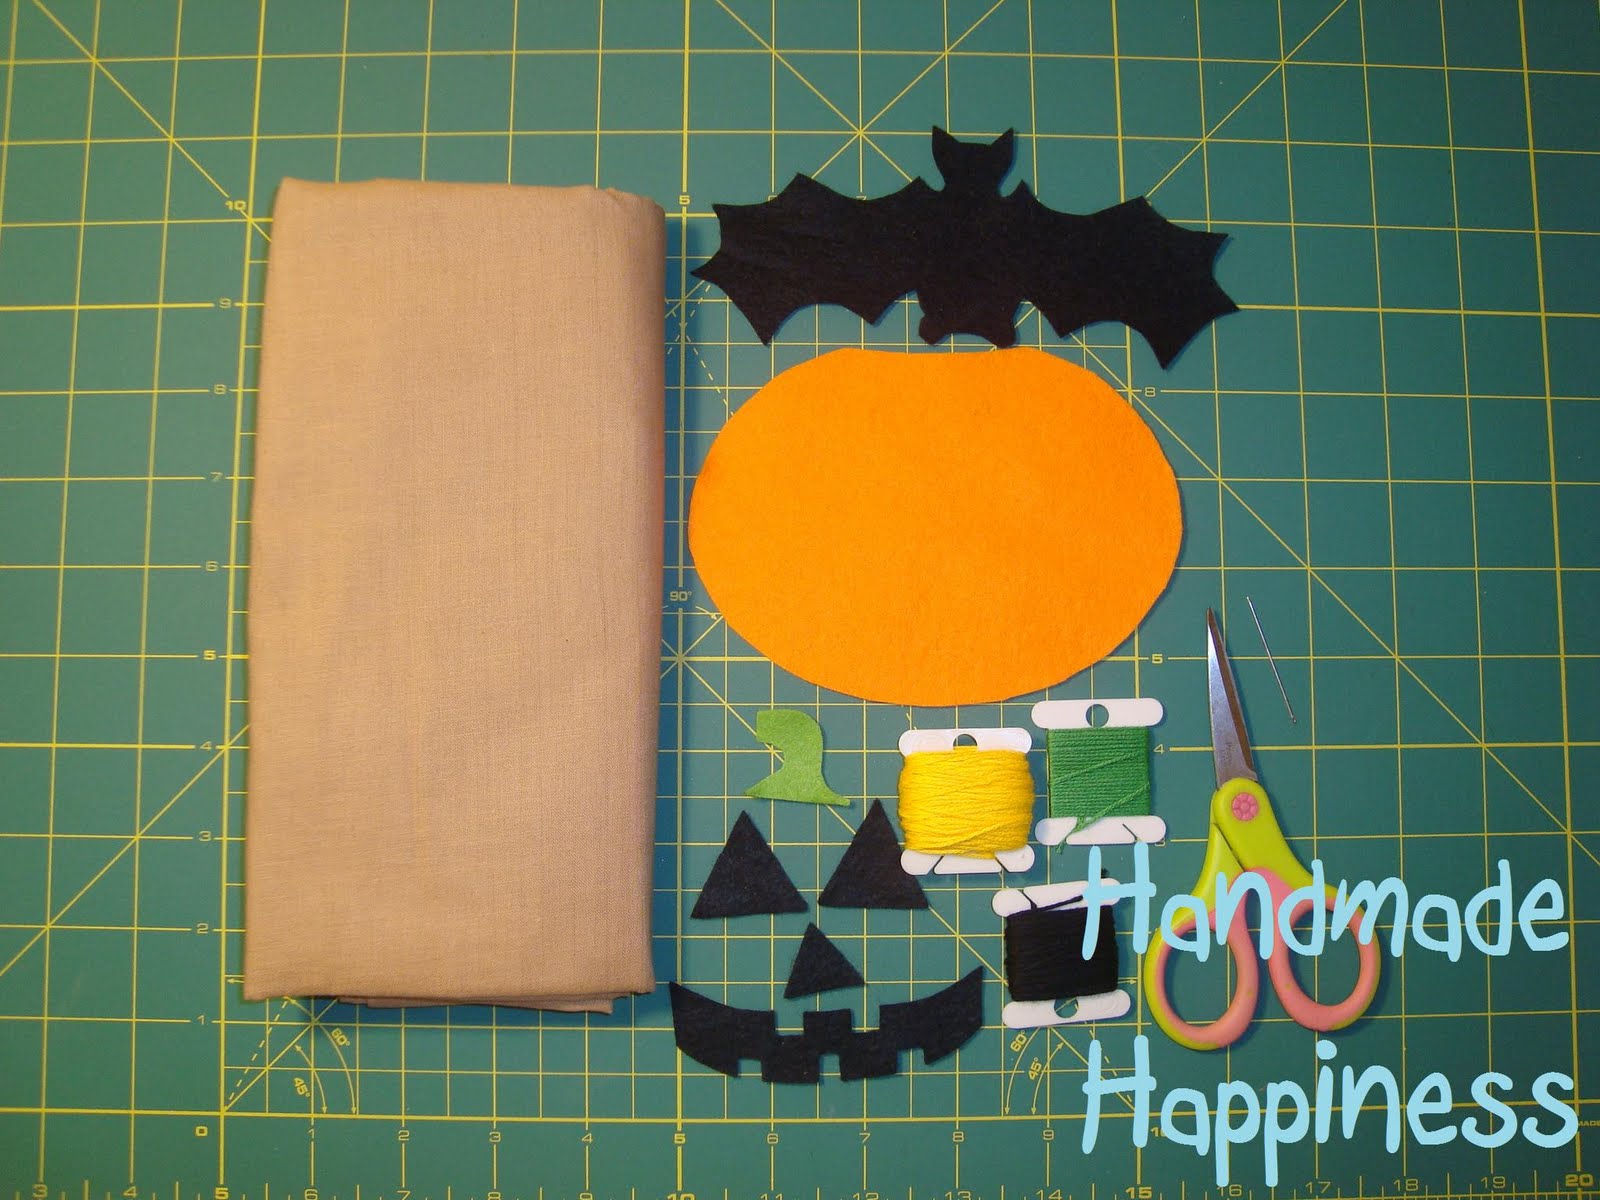
Fabric for your bag
Felt for applique
Coordinating embroidery floss
Sewing machine or you could do the whole thing by hand, like my Grandma used to. :)
Matching thread (mine didn't match but I didn't want it to)
Felt scraps or poly fill
Drawstrings/cord about 2 yards
Needle
Scissors and/or rotary cutter
*Optional items could be the embroidered patch like I did or trim or another applique or anything you can dream up, like I said totally customizable!
Let's start making a basic bag. I cut one piece of the bag fabric 14 inches by 26 and folded it in half. You can make it smaller or larger. (My little ones get tired of carrying things so mine are a little smaller than ones you'll find in stores probably.)

Now fold the 2 top edges of your bag over about an inch to make the hem and sew. Be careful here because you'll need room later for you draw strings! Set it aside.

Now you'll make your applique. Make whatever fits the bags carrier. You can freehand this design or look up clip art or if you want my pumpkin or bat you can use them too! Drop me a line and I'll email them to you! (All I did to make them was use the freehand option on Paint and printed them on card stock and cut them out to make my pattern. For my pumpkin though I printed it twice so I could cut my face pieces out as well.) Felt appliques are so easy I could do them all day! All you do it piece them together or in this case I just placed the face pieces where I wanted them and sew them on. As you probably already know from my felt food tutorials I love hand stitching on felt so of course this is what I did here too! Fell free to use your machine though.
Now lay out your bag piece with the folded edge down, right side facing you. I just eyeballed the center and then moved down about 1-1/2 inches so it would be centered when finished. Sew on applique, leave a small spot about an inch open.


Now, I didn't feel like getting out my poly fill for such a small amount so here is what I did. I made felt fill! I just took tiny little pieces out of my scrap container that were probably too small to make anything with (but my felt is so precious to me I can't bring myself to throw any of it away) and ran my rotary cutter through it in different directions about 20 times. I'm really glad I chose to do this because the little piece filled the corners of my bat better than poly fill would have!

Now stuff that applique until it is a nice little raised character. Don't stuff to much or it will pull on your bag and now look right.
Sew the opening closed.

At this point I positioned the embroidered patch and stitched it to the other side as well.

Flip bag piece so it is inside out.
Now sew down the sides making sure to not sew the very top edge closed because again you'll need that for your drawstrings.

Next you'll cut out a square from each bottom corner. I wanted Peanuts (the pumpkin bag) to be shorter and more round so I cut out a square about the size of a post it note. For Doddle Bug's (the bat bag) I wanted it to be taller and more bag shaped so I cut squares about 1-1/2 inches.

Pick up your bag and pull the square cut out to make a flat corner and sew (for pictures and instructions on this see my lunch bag tutorial. I got a little ahead of my self before I realized I hadn't taken pictures yet! I'm sorry, I got excited to see my bags!)
Do this on both sides so you now have a bottom to your bag. Flip right side out. Your bag should 'sit' now.

Now put in your drawstrings.
Grab one of your cords or drawstrings. Starting at the first hole in the hem on the right front of your bag feed it through until it comes out the other side. Now feed the same one through the back left hole all the way through to the other side. Once you have it all the way line up the ends and tie a knot. Now take your other one and starting at the front left hole feed all the way through to the end and into and through the back right hole until it comes out the other side. Line up and tie these too.


Now try it out. Did it work? I hope so because that means your all done! It's so much easier than you think, I promise!

Enjoy Trick or Treating!!
I've shared this tutorial at


As with all of my projects, I have designed them for my family and love to share with you so you can have them for your families as well. All projects, patterns and directions are meant for your personal use and neither the patterns nor completed projects are to be used for monetary gain.
Aw, this is cute! The CSI Project is going to have some Halloween linkups. You should link this up, for sure!
ReplyDeleteThis is cute! I like the possibilities!
ReplyDelete