So here is the tutorial for the bottom part of my Advent calendar. For this part you'll need a couple additional supplies; a chopstick or dowel, glue, ruler and if you want, a sewing machine.
This part may seem long and tedious but it really wasn't so bad. I got it done in a night. The longest, most repetitive part was the number embroidery. The rest was really smooth sailing!
To get started on your bottom piece cut your pocket background/ bottom base piece the same width as the top applique piece. Leave the length until the end because you'll want the wiggle room later.
Now set those two pieces aside. Cut 5 strips from the felt your using for the pockets. Mine were 1-3/4 inches tall and the same width as the other 2 calender pieces.
Now I cut out 5 little templates of the pocket size I wanted and placed them on the first strip. The with a pencil drew quide lines inbetween them. Repeat with other four strips. Then number the pockets 1-5, 6-10, 11-15, 16-20, and 21-25.
Lay the numbered strips on your background piece about 1/4 inches apart, iron, and pin in place.
Sew the sides down close to the edge but not too close because you'll want to trim a tad bit later because felt likes to distort if you put too much pressure on it.
Sew across the bottom of each strip. Sew down the lines you drew. Now here you can just do full lines all the way down or do what I did and just sew on the pocket pieces. Just lift the presser foot in between each strip.
Now take your top and bottom pieces a line them up, upside down, so they meet. Add a piece of fusible fleece to the center seam and iron. This will help you do the step after the next step.
Now cut another piece of fusible fleece the size of the whole calendar. Iron.Flip over to right side, make ties between the two pieces by running the thread from one piece on the front through the back and back out like this.
Evenly space them, as many as you want.
Now take your back pieces and if like me you needed two pieces to make up your back piece sew them together, flip over spread the seam and iron so it lays down flat.
Now lay out your back piece with the seam facing you and then lay the front piece on top facing up at you as well. Make sure your seam on the back piece lines up with the seam on your front piece. Pin it together.
Don't cut the back piece yet, again, wiggle room is good. Now sew the sides and bottom edge, leave the top alone.
Now round off the ends of your chopstick/dowel and run a line of glue down the seam between the top front and top back seam and lay your stick down.
Now run a line of glue down the stick.
Take your ruler and use it to evenly wrap the felt over the stick.
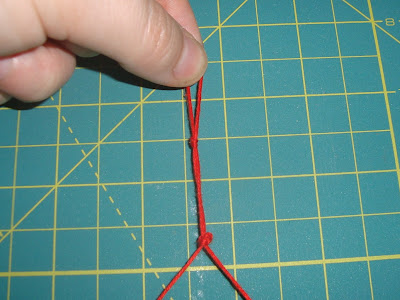
Let it dry then make little knots the same way you did earlier.
Now tuck the excess in using your scissors.
Run another line of glue down the seam and slightly fold over so the seam disappears. Tape in place to dry or use clothes pins to hold it until it dries.
Once dry remove tape (or clothes pins).
Take a push pin and carefully push it through to make a hole on both sides of the stick. I had to use a hammer and my stick split but a little wood glue at the end fixed that.
Now thread a piece of ebroidery thread through the holes.
Place a knot at the ends of both sides.
After this I also tied a couple of knots at the top of the string to make hanger loop.
So, there you go! All done!
Now, hang in there with me because Monday I'll have a little 'mover' to follow the days! Have a fun weekend!
As with all of my projects, I have designed them for my family and love to share with you so you can have them for your families as well. All projects, patterns and directions are meant for your personal use and neither the patterns nor completed projects are to be used for monetary gain.


No comments:
Post a Comment